Installing smoke detectors is one of the easiest and most effective ways to improve fire safety in your home. Many homeowners assume that setting up smoke alarms requires professional help, but the reality is that it’s a simple DIY task that can save both time and money. With the right approach, you can have your home protected in no time. In this guide, we’ll walk you through everything you need to know about installing smoke detectors yourself.
Why Install Smoke Detectors Yourself?
Hiring an electrician or installer for smoke detector installation can add unnecessary costs to an already straightforward task. DIY installation offers several advantages:
- Cost Savings: Professional installation fees can add up quickly, but DIY installing smoke detectors eliminates that extra expense.
- Time Efficiency: Instead of scheduling an appointment and waiting for a tradie to show up, you can install all your alarms in under an hour.
- Ease of Installation: Wireless 10-year battery powered smoke detectors such as ZEN, in particular, are designed for quick and hassle-free installation.
Installing Smoke Detectors – Is It Legal To DIY Install My Own?
Yes – absolutely! Wireless 10-year battery powered smoke alarms can be legally DIY installed by anyone. There is no special license or qualification required to install a wireless 10-year battery powered alarm – they are simply affixed to the ceiling with two screws. On the other hand, 240V hardwired smoke alarms must always be installed by an electrician. 240V hardwired smoke alarms must be used when constructing a new house, performing a substantial renovation to your property, or when replacing an already hardwired smoke alarm.
Choosing the Right Smoke Detectors
Before you begin installing smoke detectors, it’s important to choose the right ones for your home. There are two main types of smoke alarms available in Australia:
- Photoelectric Smoke Detectors: These are recommended for home use as they respond faster to smouldering fires.
- Ionisation Smoke Detectors: These detect fast-flaming fires but are more prone to false alarms from cooking fumes.
For best results, photoelectric smoke detectors such as ZEN are the preferred choice by Fire Authorities nationwide, and they are certified to Australian smoke alarm standards (AS 3786:2014). ZEN Smoke Alarms also come with a 10-year non-removable lithium battery, eliminating the need for battery replacements.
Tools You’ll Need for DIY Installation
Installing smoke detectors requires minimal tools. Here’s what you’ll need:
- A drill with 5mm drill bit
- A pencil for marking placement
Where to Install Smoke Detectors
Proper placement of smoke detectors is key to ensuring they work effectively. Follow these recommendations:
- Inside Every Bedroom: Sleeping areas should have their own smoke detector for maximum safety.
- Hallways: Install alarms in hallways leading to bedrooms. If there is no hallway then the nearest route of exit or travel path from the dwelling.
- Near Lithium Battery Charging Locations: If you charge an e-bike or e-scooter which contains a lithium-ion battery, it is recommended to install a smoke alarm at the charging location.
- On Every Level of the Home: Multi-storey homes should have at least one smoke alarm per floor.
Step-by-Step Guide to Installing Smoke Detectors
Step 1: Read the Instructions
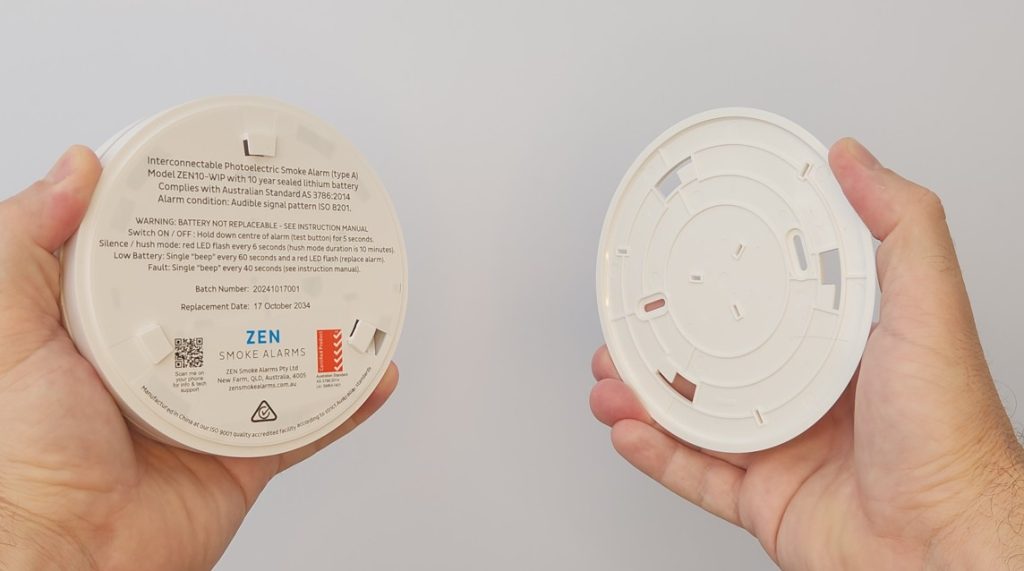
Review the ZEN Smoke Alarm the user manual to gain familiarity with your smoke alarm before installing it. Remove the mounting bracket from the rear of the alarm by twisting it anti-clockwise.
Step 2: Mark the Installation Spot
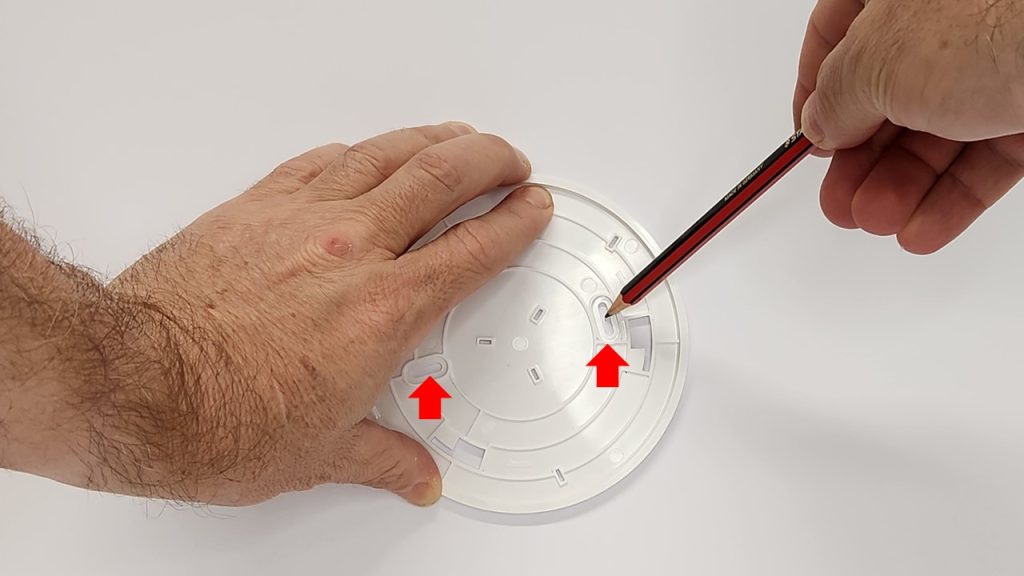
Use a pencil to mark the spot where you’ll be placing the alarm. Ceiling installation is always recommended, as smoke rises, but if ceiling mounting isn’t possible, install the alarm high on the wall, at least 30cm from the ceiling.
Step 3: Mount the Smoke Detector
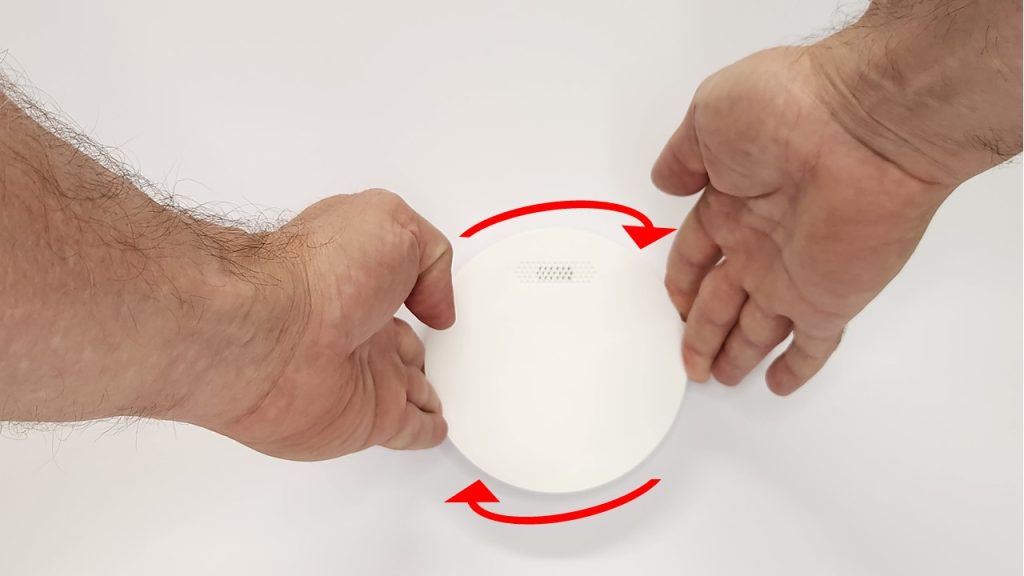
Drill two small holes with a 5mm drill bit at the marked spots, insert wall plugs (if required), and screw the mounting bracket securely into place. Then, twist the smoke detector onto the bracket.
Step 4: Test the Alarm
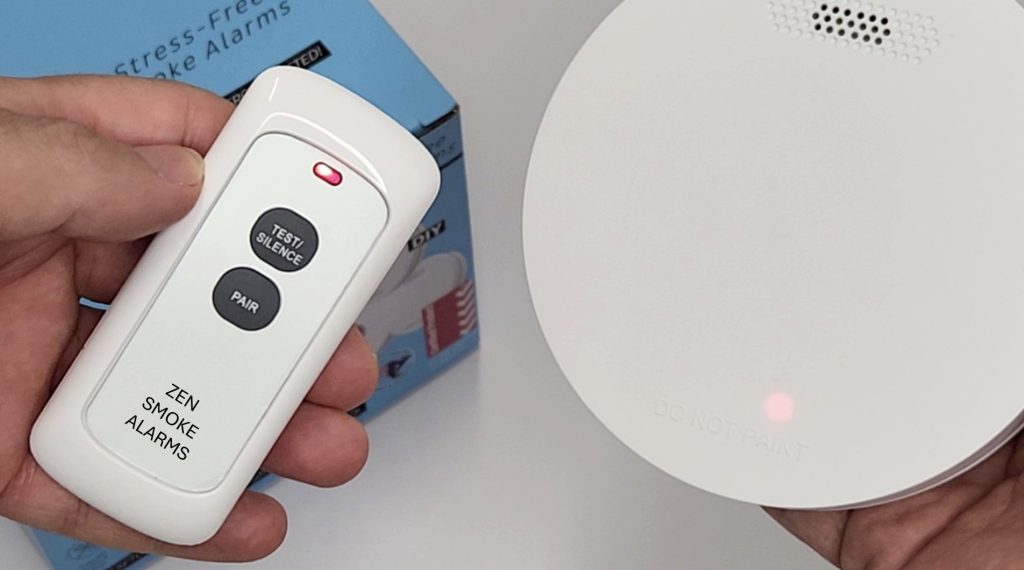
Once installed, press the test button on the alarm or use the optional ZEN remote control to ensure the alarm sounds properly. If it doesn’t, consult the user manual troubleshooting guide.
Maintaining Your Smoke Detectors
DIY installing smoke detectors is just the first step—some basic regular maintenance is necessary to keep smoke detectors working properly over their full 10-year lifespan. Here are a few simple tasks to add to your home maintenance routine:
- Test Alarms Monthly: Press the test button to make sure each unit is functioning.
- Keep Them Clean: Dust and cobwebs can affect performance, so wipe detectors with a soft dry microfibre cloth, and then use a vacuum soft brush attachment to gently vacuum the air vents around the circumference.
- Check the Expiry Date: Smoke detectors need to be replaced 10 years from manufacture date (not the date they were installed on the ceiling). Look for the manufacturing date on the back of the alarm.
Interconnecting Smoke Detectors for Added Safety
ZEN Smoke Alarms are designed to be wirelessly interconnected, meaning if one alarm is triggered, all alarms in the home will sound. This feature is particularly useful in larger homes where a fire in one area might not be immediately heard in another. ZEN Smoke Alarms purchased in a bundle pack (5/7/10-pack) will arrive to you already wirelessly interconnected as a group.
Common Mistakes to Avoid When Installing Smoke Detectors
Even though Installing smoke detectors is simple, some common mistakes can reduce the effectiveness of your alarms. Avoid these errors:
- Placing Smoke Detectors Too Close to Kitchens or Bathrooms: Steam and cooking fumes can cause false alarms.
- Installing Smoke Detectors in Dusty Rooms or Partially Enclosed Areas: Dust getting inside your smoke alarm may trigger false alarms. Smoke alarms are designed for indoor use only and should not be installed outdoors or in partially enclosed areas (outdoor patio, outdoor carports etc).
- Installing Smoke Detectors in Corners or Near Vents: Airflow and ‘dead air space’ can prevent smoke from reaching the alarm.
- Forgetting to Test Alarms After Installation: Always check that each alarm is working properly.
Additionally, QLD legislation states;
Photoelectric smoke alarms must not be placed:
- Within 300mm of a corner of a ceiling and a wall,
- Within 300mm of a light fitting,
- Within 400mm of an air-conditioning vent,
- Within 400mm of the blades of a ceiling fan.
There are special requirements for stairways, sloping ceilings, and ceilings with exposed beams. Specific requirements are further explained in the QLD Building Fire Safety Regulation 2008.
Summary
DIY installing smoke detectors is an easy, cost-effective way to improve fire safety in your home. With the right tools and a few simple steps, you can set up your ZEN Smoke Alarms in no time—without the need for professional help. ZEN’s wireless options make installation even more convenient, and interconnected alarms provide extra security. By following this guide, you’ll have peace of mind knowing your home is protected.
If you’re looking for reliable, easy-to-install smoke detectors, check out ZEN Smoke Alarms for top-quality, photoelectric models with wireless interconnectivity and a 10-year battery life. Protect your home with ZEN today!

Want to know more? Watch our ZEN Smoke Alarm YouTube channel or call us on 0478 596 402 today
We love talking smoke alarms!
ZEN Photoelectric Smoke Alarms
New Farm, QLD, 4005

